In the previous post, we have setup the Jenkins Master/Slave environment. In this post, lets see the project creation and the automation of build process along with the Continuous Integration.
Most important tabs in Jenkins UI.

Click on the "create new jobs"....


We selected Free style, because it gives platform independent template for our project...
We can restrict where this project can run .... I selected my Windows_Slave....

We have 5 main categories while building a template for out project....
First of all, let us provide details related to our SCM..


Different options for build step...


I chose to "Archive the artifacts"...

Once we are good with the Configuration part, we can save and apply....


Sample project which I built during my MAVEN post, I committed to my Git SCM...

Click on Build Now....


We need to add the MAVEN tool....


Now it is enabled in configuration.. choose the tool location...


Let's try building our project again....


This time it is a SUCCESS...
Even the Post-Build job is executed successfully, we can see the archived package file java_app.1.0.jar is generated...

As you can see, I failed 6 times. It is so important to maintain required plugins, tools and Home locations...
One more important thing which comes under Jenkins Administration:
Prepare for Shutdown...
In case of any maintenance activities we can create an alarm using this option.... shows a message and restricts any new builds till we cancel it.
################################################################################
Most important tabs in Jenkins UI.

Click on the "create new jobs"....

Choose a name for your project,

We selected Free style, because it gives platform independent template for our project...
We can restrict where this project can run .... I selected my Windows_Slave....

We have 5 main categories while building a template for out project....
First of all, let us provide details related to our SCM..

Build Triggers are something which are responsible to build our projects in time intervals..
Build Periodically: Allows us to schedule timings (as per cron schedule) to trigger our build..
Build after other project: It restricts a build that it should be build only if a particular build is done..
Poll SCM: Our SCM will poll and (if any changes done to our SVN/Git) then triggers our build.

In Build environment, we can provide our command for the build process....

Different options for build step...

Different options for Post build actions....
Post build actions: These actions decide what to be performed once a build is created...

I chose to "Archive the artifacts"...


Click on Build Now....

Console output:

It is failed, saying mvn is not recognized as internal or external command...
In the Configuration part, we already set the Home for Maven.


Now it is enabled in configuration.. choose the tool location...


Let's try building our project again....


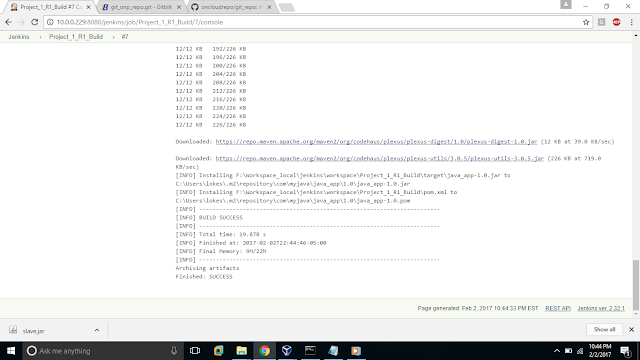
This time it is a SUCCESS...

Even the Post-Build job is executed successfully, we can see the archived package file java_app.1.0.jar is generated...

As you can see, I failed 6 times. It is so important to maintain required plugins, tools and Home locations...
One more important thing which comes under Jenkins Administration:
Prepare for Shutdown...
In case of any maintenance activities we can create an alarm using this option.... shows a message and restricts any new builds till we cancel it.
################################################################################


