In the last post, I covered only the concept of svMotion through which we can migrate the storage of our VMs among different datastores.
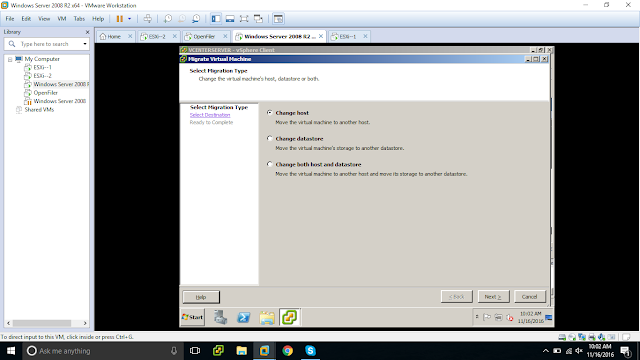
Select the Migration Type...

By default vMotion properties take Default priority, if not we will be asked to choose from below

Let's Continue with our migration process.... Verify the details and "click Finish"

Check the status of Registering VM at bottom...

We can see the current VMs in ESXi host1, and can check the logs related to unregistering VM at the bottom....

Below is the vSphere client screen for the ESXi host2 with the third VM which we migrated from ESXi host1. Below we can see the log related to Registering VM...

Similarly we can migrate Windows_VM2 VM from ESXi host2 to ESXi host1.
Right Click on VM, choose Migrate and select the ESXi host1....
Check the log at the bottom..... Relocate Virtual Machine.... Completed.


vSphere Client Screen of ESXi host2 (192.168.56.135)...

At the end, after performing Host migration of VMs on both the hosts....
192.168.56.134 (Host1) with Windows_VM2 and 192.168.56.135 (Host2) with Windows_VM


So far we covered the vMigration concept which is Host migration, now let us see how we can migrate both the Host and Datastore at a time.
Current Status of Windows_VM.... It is in host2 and on storage1...

Choose the VM and then right click...

Select migration type as "Change host and datastore"...

Next choose destination host, I chose 192.168.56.134 (Host1)....

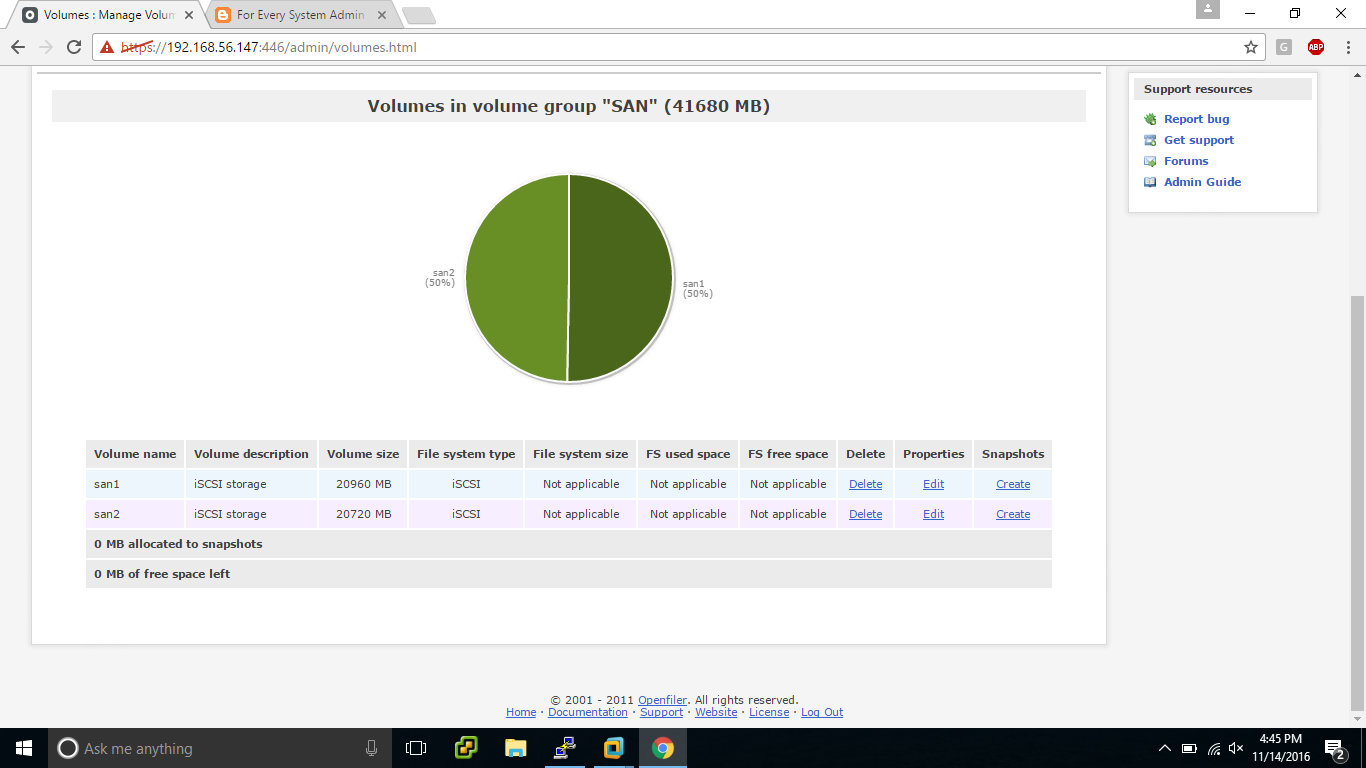
Time to select storage, Since it is already in storage1 so lets select Storage2...

Verify the details selected before,

This relocation of VM takes few minutes as it need to copy the storage too...

Due to some issues, I removed Windows_VM2 during relocation in progress... So didn't get confused... Finally our Windows_VM relocation completed successfully....

Check the latest logs at the bottom of both the vSphere client screens....


Finally after completion vMotion and svMotion on our Windows_VM, below is the current status of our Virtual Machine....
It is on Host1 (192.168.56.134) and Storage2....

#####################################################################################
In this post we are going through the host migration alone and migration of both the host and datastore...
Current scenario of the two ESXi hosts,
192.168.56.134 (Host1) with Windows_VM on its storage1 and
192.168.56.135 (Host2) with Windows_VM2 on its storage2


192.168.56.135 (Host2) with Windows_VM2 on its storage2


Right click on Windows VM to see the options and click on Migrate....

Select the Migration Type...

Select the destination host, browse through DataCenter and Clusters....

By default vMotion properties take Default priority, if not we will be asked to choose from below


Check the status of Registering VM at bottom...

We can see the current VMs in ESXi host1, and can check the logs related to unregistering VM at the bottom....

Below is the vSphere client screen for the ESXi host2 with the third VM which we migrated from ESXi host1. Below we can see the log related to Registering VM...

Right Click on VM, choose Migrate and select the ESXi host1....
Check the log at the bottom..... Relocate Virtual Machine.... Completed.

vSphere Client Screen of ESXi host1 (192.168.56.134)...

vSphere Client Screen of ESXi host2 (192.168.56.135)...

At the end, after performing Host migration of VMs on both the hosts....
192.168.56.134 (Host1) with Windows_VM2 and 192.168.56.135 (Host2) with Windows_VM


So far we covered the vMigration concept which is Host migration, now let us see how we can migrate both the Host and Datastore at a time.
Current Status of Windows_VM.... It is in host2 and on storage1...

Choose the VM and then right click...

Select migration type as "Change host and datastore"...

Next choose destination host, I chose 192.168.56.134 (Host1)....

Time to select storage, Since it is already in storage1 so lets select Storage2...

Verify the details selected before,

This relocation of VM takes few minutes as it need to copy the storage too...

Due to some issues, I removed Windows_VM2 during relocation in progress... So didn't get confused... Finally our Windows_VM relocation completed successfully....

Check the latest logs at the bottom of both the vSphere client screens....
ESXi Host2

ESXi Host1

Finally after completion vMotion and svMotion on our Windows_VM, below is the current status of our Virtual Machine....
It is on Host1 (192.168.56.134) and Storage2....

#####################################################################################